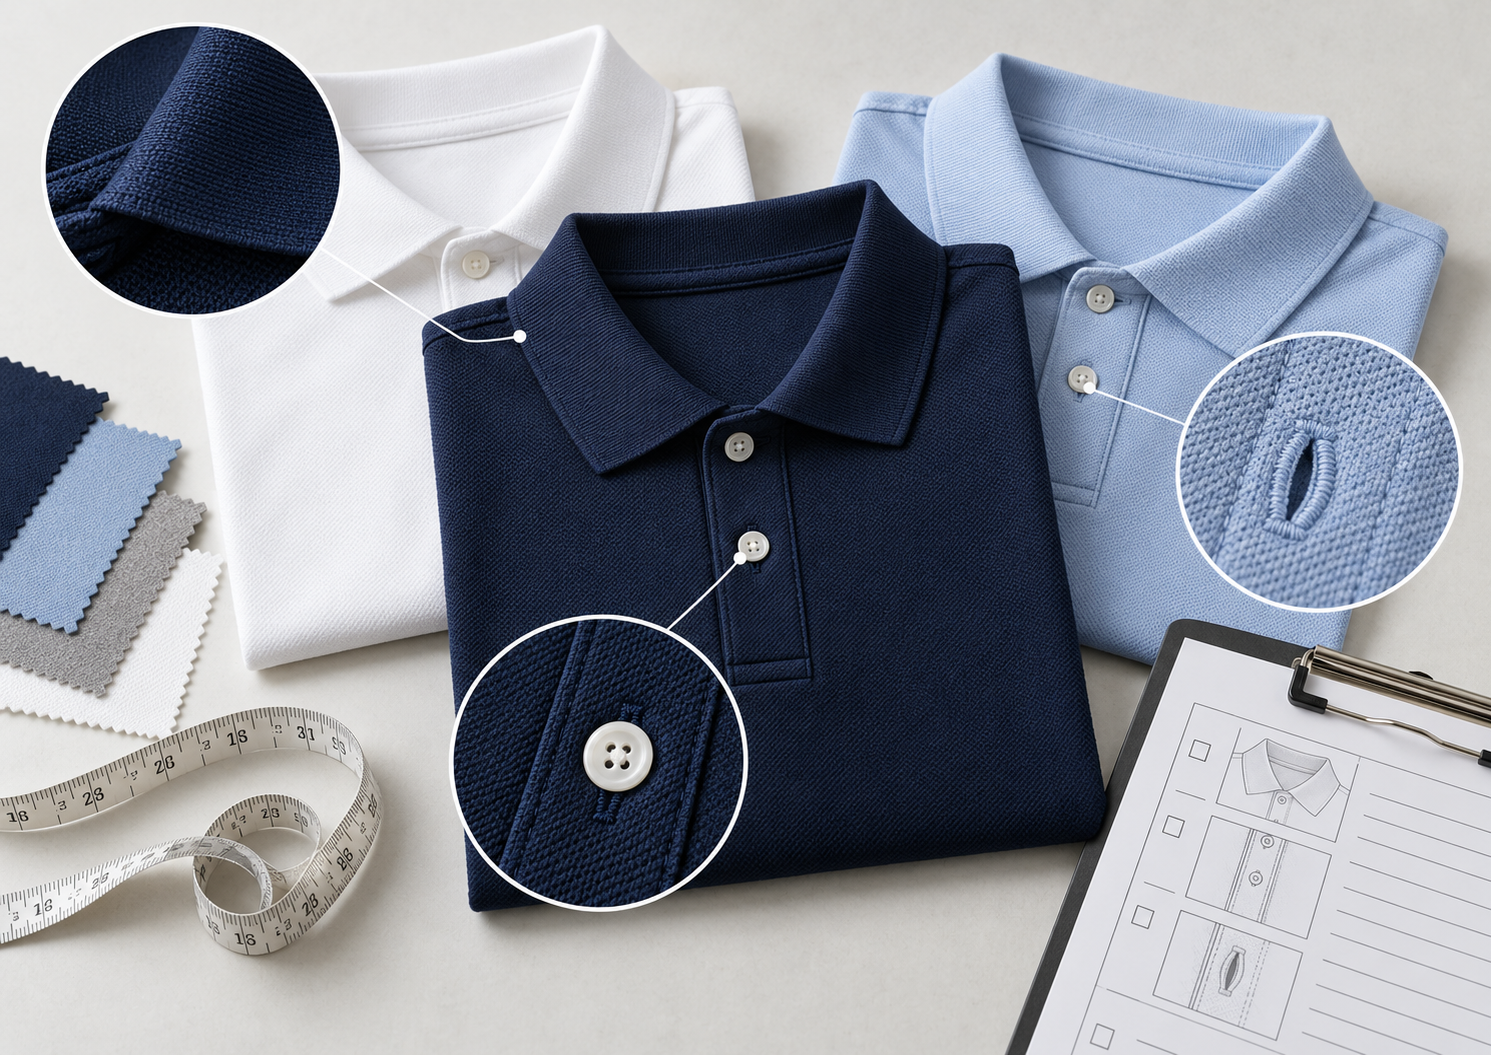
A polo can meet its body measurements and still look wrong at the neckline. A collar that lifts at the tips, a placket that pulls to one side or a buttonhole that stretches after washing can change the appearance of the entire garment. Those faults are especially visible on uniform and private-label programs where several sizes and repeat orders must look consistent.
Inspect the collar and placket as one construction area, first on the new sample and again after the agreed care process. This guide gives buyers a record they can attach to a tech pack or sample approval email. It does not replace an agreed inspection standard or a supplier’s technical diagnosis.
Define the collar and placket before checking workmanship
Begin with the actual reference garment. A polo may have a self-fabric collar, a rib collar, a contrast collar or a zip opening. The collar type changes what should be measured and how the opening behaves. The NOVITA custom piqué polo reference shows a three-button placket, self-fabric collar, ribbed cuffs and side vents. Its fabric composition and weight are specified separately at sampling.
For that reference, the sample brief should state the collar shape, finished collar width, placket length and width, number and position of buttons, buttonhole direction, topstitching and the intended collar appearance when worn. For a contrast-collar style, add the approved color reference and the point where the contrast joins the body. The two-tone corporate polo reference illustrates why that additional color and construction check matters.
Do not use “standard polo collar” as a complete instruction. The supplier still needs a measurable, photographable target.
Check the placket closed, open and on the wearer
Lay the sample on a level surface without pulling the knit into shape. Button it as a customer would. Look for a center front that hangs straight, two placket edges that appear parallel and a lower placket end that lies flat. Compare the distance between buttons and the relationship between each button and buttonhole with the approved specification.
Then open the placket. Check the inside finishing, lower opening reinforcement, raw edges and any visible puckering around the stitches. Finally, inspect the sample on a wearer or fitting form. A front opening that appears straight on a table can twist when the body fabric is under normal wearing tension.
Photograph all three states. Label the photos with sample version and size. If the issue appears in only one size, record that rather than calling the entire range defective.
Separate visible defects from their possible causes
A buyer can reliably record what is visible without pretending to diagnose the sewing line from a photograph. Several construction choices can produce similar symptoms. For example, placket puckering may relate to fabric handling, stitch tension, reinforcement or the way the opening was assembled. The cause requires inspection of the actual sample and process.
| Observation | What the buyer should record | What to ask the supplier to check |
|---|---|---|
| Placket curves off center | Front photo with placket buttoned; size and version | Cutting, fold width, alignment and handling during assembly |
| Wrinkles around opening | Close-up before and after care | Fabric and reinforcement compatibility, stitching and pressing |
| Uneven button spacing | Measured distance against approved specification | Button and buttonhole placement template |
| Collar tips curl upward | Worn front photo before and after care | Collar construction, attachment and material recovery |
| Collar and body differ in shade | Same-lighting photo against color reference | Material lots, finishing and color approval |
A technical corrective action should identify the confirmed cause, the proposed change and a new sample or evidence showing the result. A vague note such as “improve sewing” is difficult to verify at the next review.
Reinspect after the agreed care process
A freshly pressed sample can hide distortion that becomes visible after washing or drying. Use the care method agreed for the product and record the conditions. Compare the sample’s collar shape, placket straightness and relevant measurements before and after that process. Do not assume one wash cycle proves long-term durability. Our polo collar inspection case shows why recovery should be checked rather than judged by appearance alone.
If a contrast collar is used, inspect whether its shade and shape remain compatible with the body. If an interlining or stabilizing component is specified, check the appearance for bubbling, separation or a hard ridge. Do not prescribe one universal interlining weight for every piqué or jersey polo; the actual materials need to be evaluated together.
Keep before-and-after photographs in the same orientation and lighting. A buyer should be able to tell which version was tested and whether any corrective sample replaced it.
Record collar and placket approval by sample version
A concise sign-off record is more useful than a long email thread. The fields below can be copied into the approval sheet. Use the brand’s own tolerances where measurements are required; this article does not invent universal millimeter limits.
| Item | Reference | Sample finding | Decision |
|---|---|---|---|
| Collar type and outline | Approved drawing or garment | Photo and measurements | Approve / Revise / Confirm |
| Collar roll and tip position | Worn reference view | Before/after-care photos | Approve / Revise / Confirm |
| Placket length and width | Tech pack POM | Measured sample | Approve / Revise / Confirm |
| Button and buttonhole placement | Trim and placement sheet | Measured spacing and function | Approve / Revise / Confirm |
| Center-front appearance | Approved front photo | Closed/open/worn views | Approve / Revise / Confirm |
| Contrast color, if used | Approved swatch | Same-lighting comparison | Approve / Revise / Confirm |
Attach the sample version, date, reviewer and unresolved comments. If the placket is approved but the collar still needs revision, mark the two separately. Otherwise the supplier may treat a partial approval as permission to start bulk production.
Decide what must be checked again in bulk
After sample approval, identify the appearance points that should be checked during production and at final inspection. The same collar outline, center-front alignment, button placement and material references should appear in the bulk quality instructions. The sampling record is a reference, not proof that every finished garment will match it.
For private-label programs, check how neck labels, embroidery and packing affect the neckline. A chest logo can pull on a lightweight knit if its backing and placement are not suitable. Packing pressure can also affect the appearance of a soft collar when garments are unfolded. Keep these as specific checks rather than broad promises of “perfect quality.”
NOVITA’s current polo shirt manufacturing guide explains the wider fabric, sampling and production brief. This article deals only with the collar and front opening. For fabric structure differences, consult the polo fabric guide.
What to send with a polo sample inquiry
Send a front photo of the desired collar and placket, a reference garment or drawing, the selected knit direction, intended decoration, size range and order quantity by color. Mark any unresolved collar construction or trim decisions. If you have an existing sample with a visible defect, attach the close-up and describe when the problem appeared.
NOVITA’s current custom polo product range generally state a minimum of 100 pieces per color, with mixed sizes allowed, and sample development around 7–14 days. Actual terms depend on the approved materials and project. Contact NOVITA with the reference and quantity breakdown to discuss the specific sample rather than relying on a generic specification.