Why stitch class matters in a garment specification
A stitching specification should give the factory a clear instruction for each seam. A garment-wide note such as “use suitable stitching” leaves decisions about construction, stretch and seam security unresolved.
Use one specification row per seam as the working framework. Identify the garment location, record the seam type and stitch type, then add the density, thread and supporting parameters needed for that operation. The same row should tell the buyer how to check the result on a sample and during production.
ASTM D6193 describes seam performance through strength, elasticity, durability, security and appearance. Their relative importance depends on the garment’s end use. A denim inseam, a knitted Polo hem and a woven shirt placket therefore need different decisions, even when they belong to the same product range.
For buyers, those decisions affect sample approval, rework and the consistency of bulk production. Agreeing them before production gives the factory a defined construction to follow and the buyer a reference for inspection. Stitch class establishes the family of construction; the rest of the specification makes that choice usable.
Stitch class, stitch type and seam type: what each field means
These terms describe different parts of a sewn construction:
| Term | What it describes | Specification example |
|---|---|---|
| Stitch class | The family to which a stitch type belongs, based on thread formation | Class 300 |
| Stitch type | The specific stitch construction within that family | 301 lockstitch |
| Seam type | The arrangement of the materials and the location of the stitching | 1.01.01, an ISO 4916 Class 1 superimposed seam |
ISO 4915 stitch-type numbers have three digits; the first identifies the class. A class number gives the family, while a stitch-type number identifies a particular construction. “Class 300” is therefore less specific than “stitch type 301.”
Seam types use a separate system, ISO 4916. Its five-digit designations describe material configuration and stitching location. ISO 4916 calls for the stitch-type designation to accompany the seam designation so that the seam specification is meaningful.
Choose the seam and stitch together, considering material configuration, seam function, stretch, appearance and the production method. A suitable stitch cannot compensate for an unsuitable material arrangement. For example, 503 is intended for edge finishing and is unsuitable for joining a loaded seam.
Keep the fields visibly separate. A labelled entry such as Seam type: 1.01.01 | Stitch type: 301 | SPI: 10–12 is easier to interpret than an unexplained string of codes. This illustrates the format; it does not prescribe that combination for a particular garment.
Build each row around the following information:
| Field | What to agree with the factory |
|---|---|
| Garment location | The seam or operation covered by the row |
| Seam type and stitch type | The actual material arrangement and stitch construction |
| Stitch density or cycle count | The agreed value or range, with its unit |
| Thread specification | Fibre, construction and Tex size |
| Supporting parameters | Needle compatibility; needle spacing, bite, hem width or other dimensions where relevant |
| Seam-end securing and reinforcement | The securing method and any specified reinforcement locations |
| Verification | Measurement location, checking method and approval record |
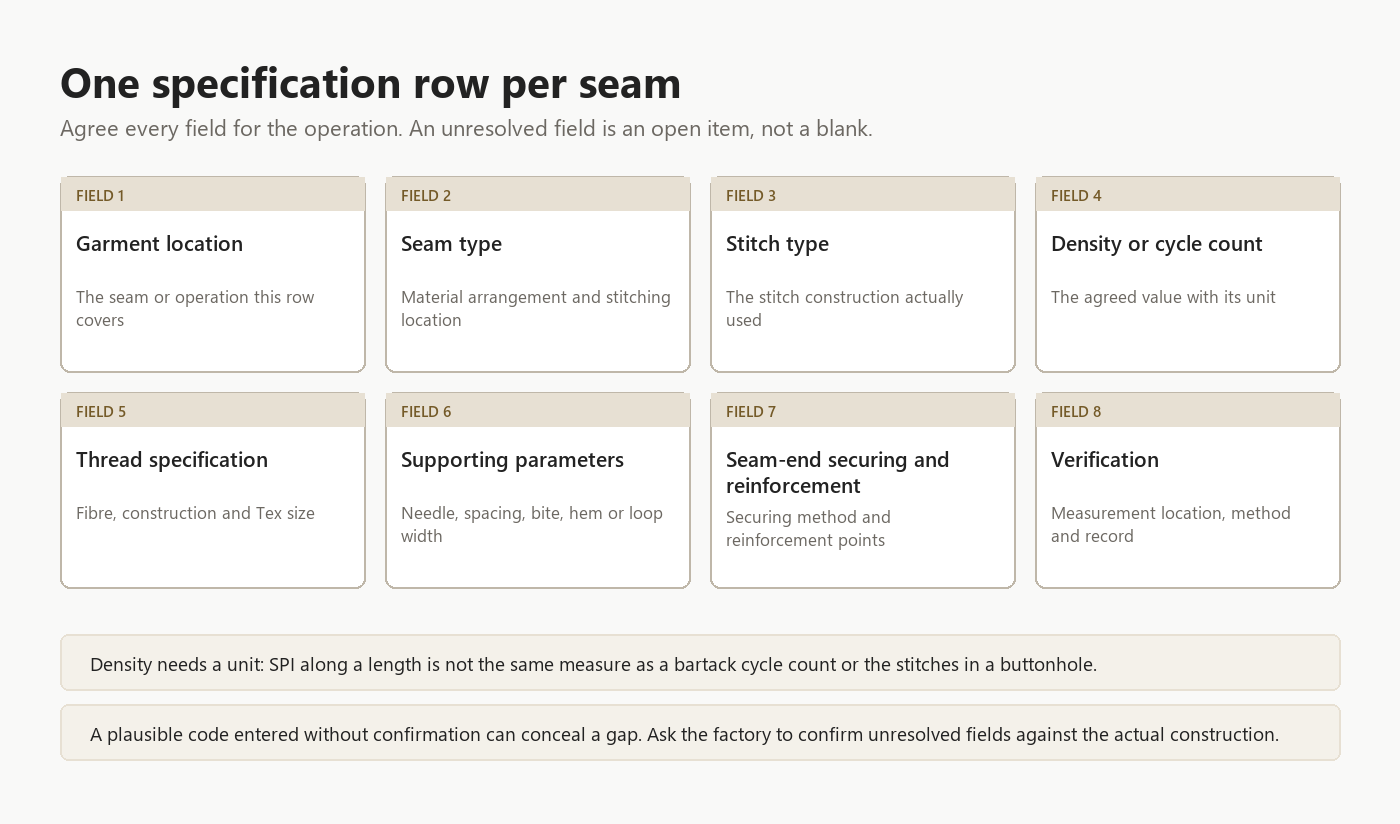
Ask the factory to confirm unresolved fields against the actual construction. A plausible code entered without confirmation can conceal a gap in the specification.
The six stitch classes buyers need to recognise
The six classes provide a useful reference for discussing types of stitches with a factory. Buyers need enough familiarity to identify the construction and ask for its supporting parameters.
The overview below draws on A&E’s stitch matrix, Coats’ technical guidance and AMANN’s industrial stitch references.
| Stitch class | Examples | Typical applications and buyer concerns |
|---|---|---|
| 100 | 101, 103 | Single-thread chainstitch constructions. 101 is used for temporary stitching and pocket closures in tailored clothing; 103 is used for blind hemming and lapel padding. 101 unravels readily and is unsuitable for loaded seams. |
| 200 | 209 | Hand-stitch types, including the machine-produced single-thread lockstitch form. These are mainly background knowledge for casualwear buyers; confirm the purpose if specified. |
| 300 | 301, 304 | Lockstitch constructions. 301 is used for straight stitching and topstitching on wovens; 304 includes zigzag, bartacking and button operations. Consider elongation and stitch security. |
| 400 | 401, 406, 407 | Needle and looper threads interloop. 401 is used for woven main seams; 406 for hems, binding, elastic attachment and belt loops. Confirm dimensions and seam-end securing. |
| 500 | 503, 504, 505, 514, 516 | Overedge and safety-stitch constructions. Distinguish edge finishing from joining: 503 and 505 are edge-finishing options, while 504 has joining applications. 516 combines 401 and 504. |
| 600 | 602, 605, 607 | Constructions using needle threads, a top covering thread and a bottom looper thread. Applications include knit hems, binding and flatseaming. Coverage, comfort, stretch and consumption matter. |
For casualwear, classes 300, 400, 500 and 600 offer a practical starting point. The working set varies with the product range and factory equipment; it is not a fixed list prescribed by a standard.
Specify the parameters that distinguish the operation. A&E’s matrix calls for needle spacing and SPI with 406 and 407, and width bite and SPI with 503, 504 and 505. A stitch number alone cannot communicate the intended finished dimensions.
Matching stitch types to fabric and seam position
Start with the fabric’s stretch behaviour, then examine the seam’s location, load and appearance requirements. Woven constructions can use lockstitch for structural seams. Stretch knits need seams that extend with the fabric, making overedge and coverstitch constructions relevant choices.
Coats identifies low elongation as a limitation of 301. If the seam cannot extend as far as the knitted fabric needs to stretch, thread breakage or seam damage may result. Confirm the choice on a sewn sample.
The following combinations are starting points for discussion, not a finished production specification:
| Fabric or location | Stitch types to discuss | What the buyer should confirm |
|---|---|---|
| Lightweight wovens, including shirts | 301 joining with 503 edge finishing | Which operation carries the load and which finishes the edge |
| Medium-weight wovens, including twill trousers | 301, 304 and 515/516, according to operation | Main-seam construction, reinforcement and any combined safety-stitch operation |
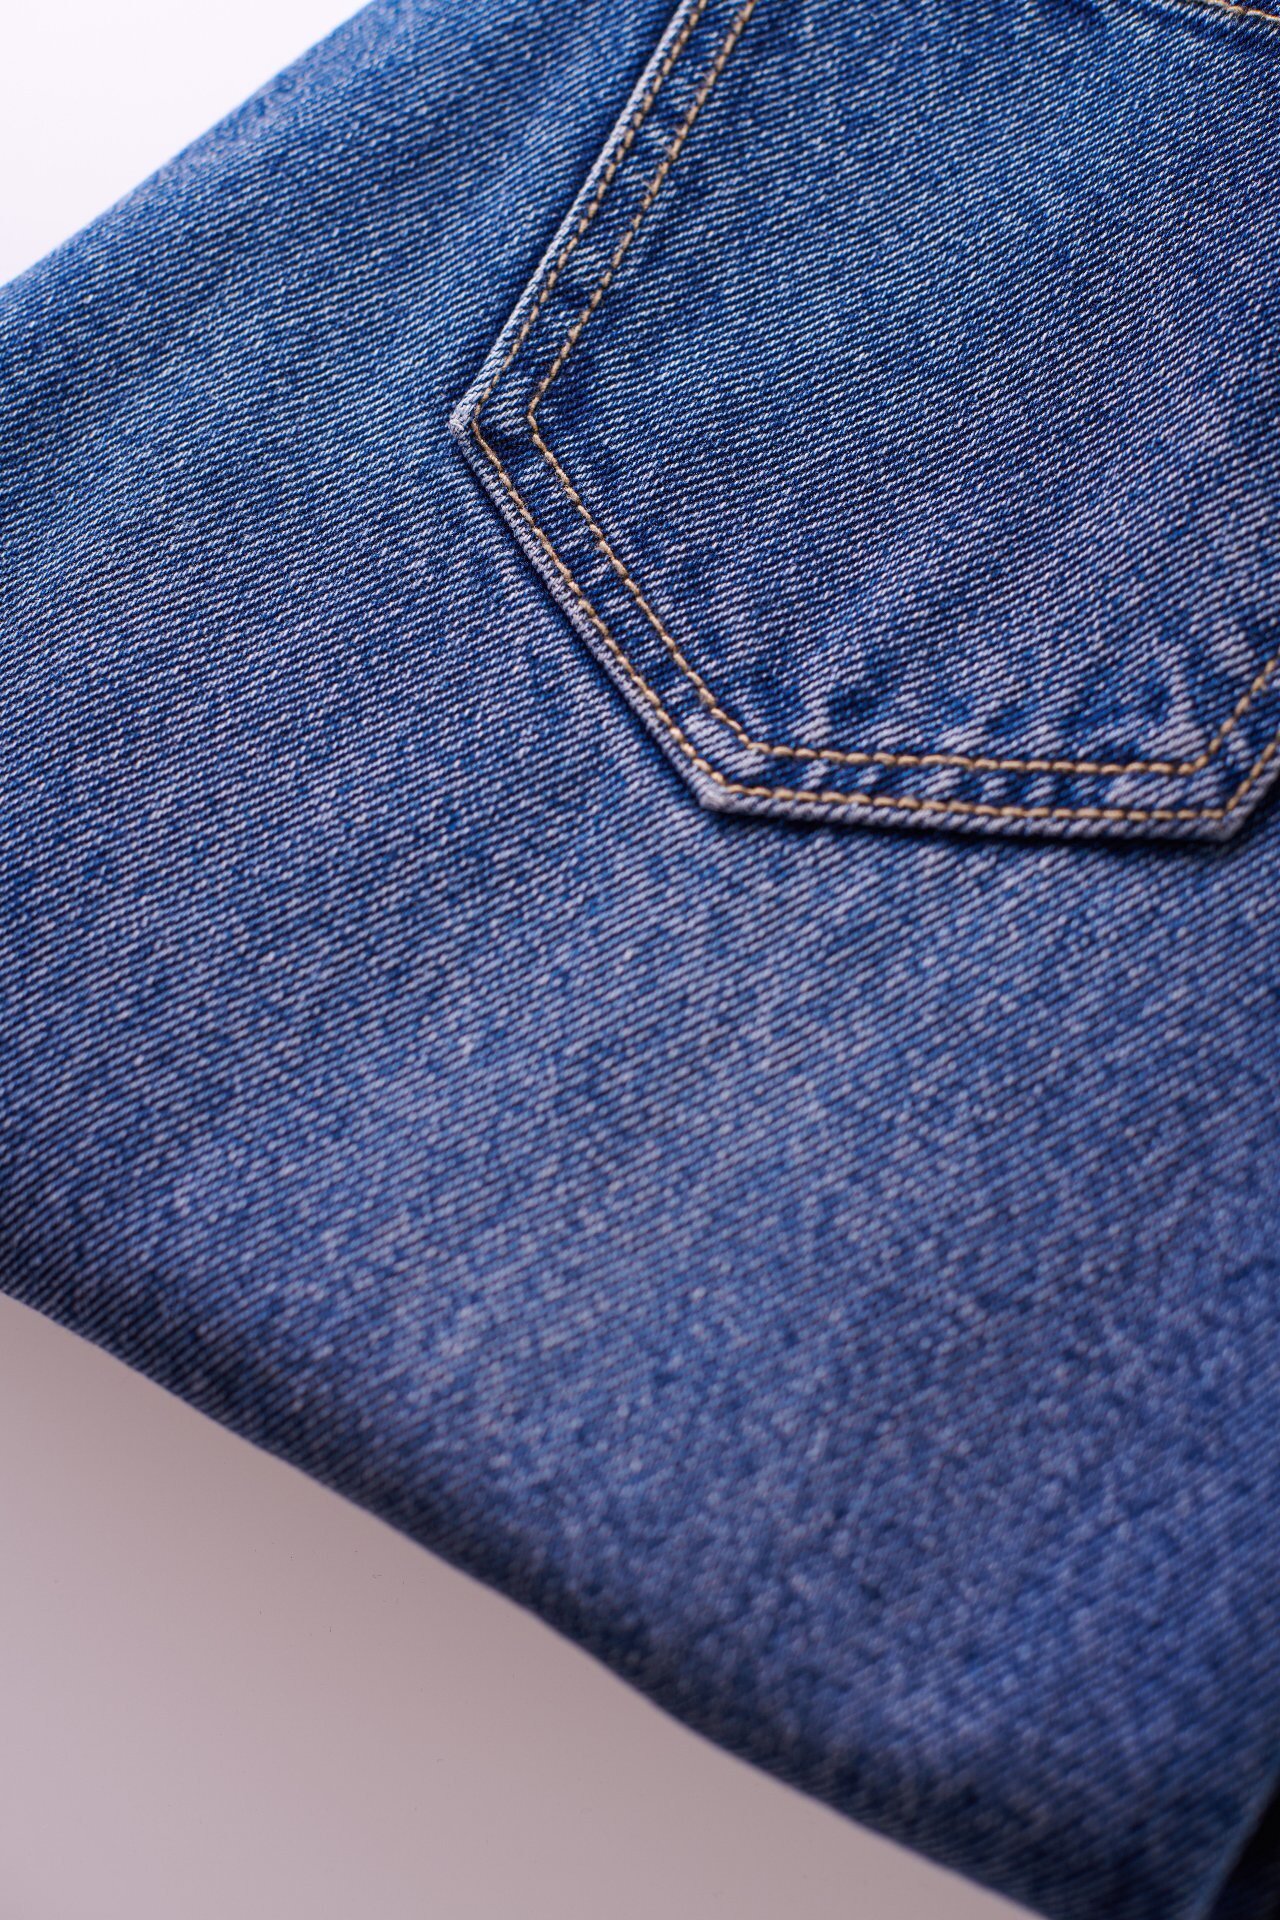
| Denim waistband and inseam | 401 at the waistband; 516 for the inseam | Required stretch, edge coverage and seam-end securing |
| T-shirts and Polo shirts | 504 for joining; 406 for hems; 602/605 for relevant covering or binding operations | The construction at each location and its dimensions |
| Stretch knits and sportswear | 607 flatseaming and 504 overedge operations | Stretch, comfort and the function of each seam |
| Locations needing transverse extension | 304 or 404 zigzag; 406/605 where covering is required | Whether the operation is binding, topstitching or another specified construction |
Several distinctions deserve attention. A&E limits 505 to serging. It should not replace a joining stitch in the specification. By contrast, Coats describes 504 as suitable for joining material plies as well as controlling fraying.
In 516, the 401 element bears the load, while 504 covers the edge and provides additional seam security. Inspect both functions. Edge coverage is part of the construction’s performance.
A&E also distinguishes 504 from 514: the wider seam allowance associated with the two-needle 514 provides greater elasticity. A narrow-bite 504 construction needs sufficient SPI and correct stitch balance. Confirm the combination on the intended fabric.
Location changes the supporting dimensions. A&E gives a 406 hem example with a 1-inch hem and 1/4-inch needle spacing, and a belt-loop example with 1/4-inch needle spacing and 3/8-inch loop width. These are supplier examples, not universal dimensions. They show why the same stitch type needs separate specification rows for different operations.
Stitches per inch and stitch density: specify each seam
Stitches per inch, or SPI, describes stitch density along the seam. A&E identifies its influence on seam strength, stitch appearance and elasticity in stretch fabrics. It also affects consumption and sewing output.
Higher density is not automatically better. Additional needle penetrations can damage susceptible fabrics, and A&E notes increased needle-cutting risk when SPI rises on knits. The agreed density needs to work with the fabric, thread and construction.
Selected A&E guidance provides a starting point:
| Garment category | Suggested SPI |
|---|---|
| Denim jeans, jackets and skirts | 7–8 |
| Twill trousers and shorts | 8–10 |
| Casual shirts and blouses | 10–14 |
| Dress shirts | 14–20 |
| Knitted T-shirts, tops and Polo shirts | 10–12 |
| Fleece | 10–12 |
| Stretch knits containing Lycra or Spandex | 14–18 |
These are supplier recommendations by garment category. They do not assign an approved density to every seam within that category. Use them to start the discussion, then agree each seam’s requirement through sample verification.
Keep units separate. SPI measures density along a length; a bartack cycle count or the total stitches in a buttonhole describes a completed operation. Record the unit beside the number rather than putting every operation under an SPI heading.
For specification clarity, choose either a target with tolerance, such as 11 SPI ±1, or an acceptance range, such as 10–12 SPI. The target communicates the intended setting; the range communicates the acceptance boundary. Avoid adding an unexplained tolerance to an existing range. If both are needed, define their relationship in the project’s acceptance rules.
Include the measurement location and method. A ruler beside the seam allows the stitch count to be checked over an inch. Use the same method for samples and production, and record the measured result against the relevant row.
Where the factory works in metric units, an equivalent can help communication: 12 SPI is approximately 4.7 stitches/cm, or a 2.1 mm stitch length. This is a unit conversion, not another acceptance requirement.
Thread selection and consumption: what buyers need to confirm
Agree thread construction before treating Tex as the complete thread specification. Corespun is a common option for woven apparel. A&E describes textured polyester and nylon threads as common choices for stretch-knit overedge and coverstitch operations because of their coverage and elasticity.
Tex expresses the gram weight of 1,000 metres of undyed yarn. Record fibre, construction and Tex together, then ask the factory to confirm a compatible needle size and point for the fabric. Increasing thread size can require a larger needle, which can increase fabric damage and needle-cutting risk.
For consumption, the factory can measure thread removed from a known seam length, use an applicable estimation formula, or consult a consumption table. A&E and AMANN describe these approaches. Check that the estimate reflects stitch type, density, seam thickness and length; calculate each seam before adding the garment total.
Both suppliers describe a general waste allowance of 10–15%. Treat it as guidance for discussion, rather than a fixed allowance for every order. Thread consumption multiplied by thread unit cost provides a useful cross-check for the quotation and material plan.
Keep thread consumption ratio separate from stitch balance. The ratio concerns how much needle and looper thread is consumed; balance concerns correct stitch formation and tension. A consumption calculation cannot demonstrate that the sewn stitch is correctly balanced.
Visible stitching defects: likely issues and verification actions
Use visible defects to organise questions. They do not prove a single cause. The table below brings together supplier-described mechanisms and buyer verification actions; the grouping is editorial guidance, not a standard diagnostic chart.
Buyers can observe, measure and compare. Ask the factory to perform checks involving clipped threads, cut fabric or machine settings and to explain the findings.
| Visible defect | Possible specification or setup issue | Verification action |
|---|---|---|
| Puckering | Yarn displacement, excessive tension, uneven feeding or shrinkage differences | Ask the factory to distinguish them: puckering remaining after thread clipping suggests displacement; reduction suggests tension. For feeding, cut across the affected seam, remove the thread and compare ply lengths. For shrinkage, compare marked seam length before and after finishing and pressing. |
| Seam grinning | Loose stitch balance or insufficient SPI | Pull perpendicular to the seam, observe opening, then release and check closure. Compare density with the specification. |
| Stitch cracking | Excessive tension, insufficient SPI, thread size or other construction mismatches | Extend along the stitch line to the maximum stretch expected in use. Check whether the thread breaks or the fabric fails. |
| Needle holes or cuts | Needle size or point incompatible with the fabric; damage may have another origin | Establish whether damage follows needle-entry locations. Ask the factory to check needle compatibility and rough machine surfaces. |
| Cut stitches at seam crossings | A later operation damages an existing stitch line; tension, thread size or needle condition may contribute | Review the crossing and operation sequence with the factory. Ask for its checks on needle condition and setup. |
| Skipped stitches | Excessive tension; at buttonholes or bartacks, material flagging or tool and holding conditions; an intentional blindstitch setting may need clarification | Identify the affected operation. Confirm whether skipping was specified, then request the factory’s assessment of tension and relevant tool or holding conditions. |
| Chainstitch runback | The specified seam-end securing method is missing or has not been applied | Confirm the method in the specification and check its execution on the sample. |
| Missing or inadequate bartacks | Reinforcement locations omitted, unsuitable dimensions or thread outside the machine’s workable range | Check each specified location, dimensions and stitch count. Ask the factory to confirm equipment compatibility. |
| Button attachment unravelling | Single-thread chainstitch button attachment | Confirm the attachment construction. A&E recommends lockstitch buttonsewing to address unravelling. |
| Uneven stitch appearance | Stitch balance or tension | For 401, ask the factory to check balance using the needle-loop coverage assessment described by A&E. |
A&E’s 401 balance check involves removing the looper thread and examining needle-loop coverage towards the next needle penetration. It checks stitch balance. It does not verify seam-end securing or establish a runback acceptance limit.
Agree seam-end securing requirements separately with the factory. Similarly, confirm bartack dimensions, thread and cycle count for the actual machine and fabric; supplier descriptions of common machines are not universal limits.
Check puckering after applicable washing and pressing. Record when the defect appears so that the factory investigates the relevant stage rather than changing a parameter without evidence.
Sample approval and production verification
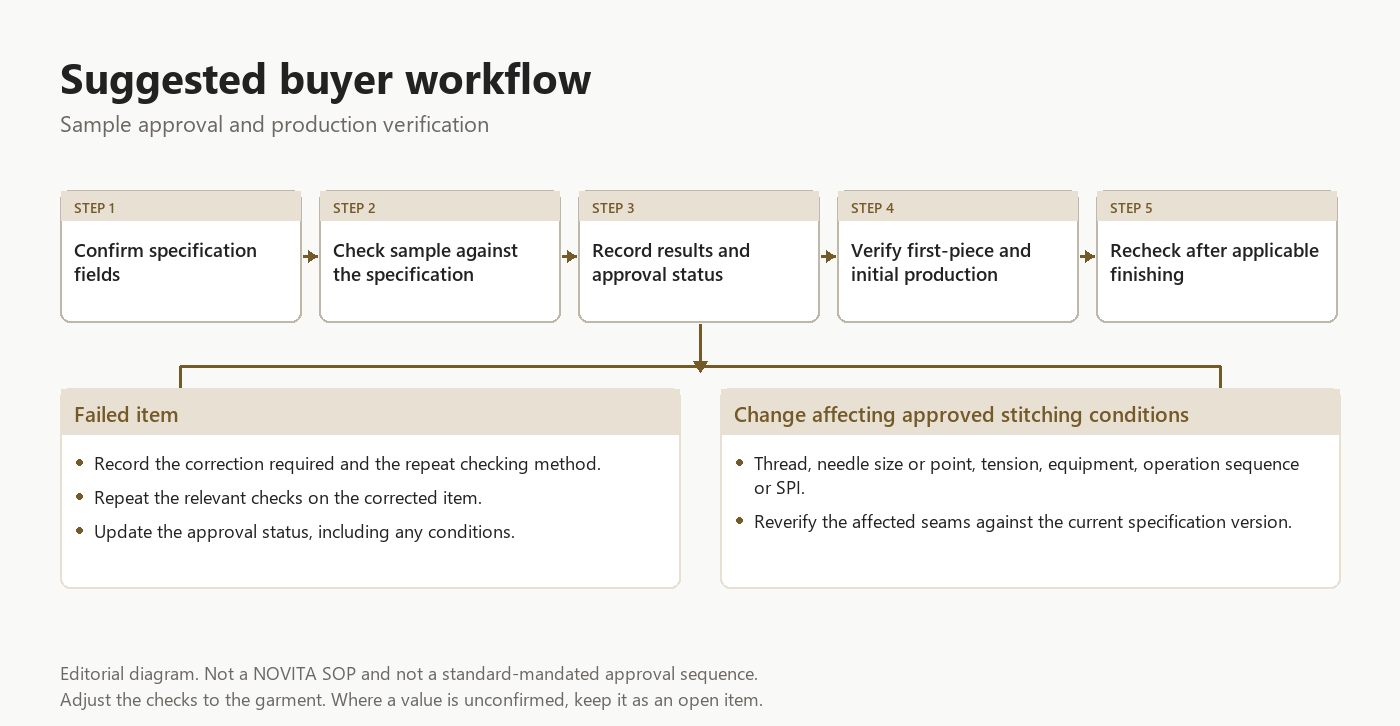
The following workflow is a suggested buyer framework. It is not a NOVITA SOP or a standard-mandated approval sequence. Its purpose is to connect each specification row with a checked sample and a production record.
Check the sample against the specification
Locate every specified seam and reinforcement point. Ask the factory to confirm the actual seam and stitch types against its equipment and operations; a surface photograph alone cannot establish the code.
Measure density at the agreed locations. Check supporting dimensions, seam-end securing and reinforcement. For stretch locations, perform the perpendicular opening-and-recovery check and the along-seam extension check described above. Record puckering, skipped stitches, needle damage and uneven stitching, then request evidence for any proposed correction.
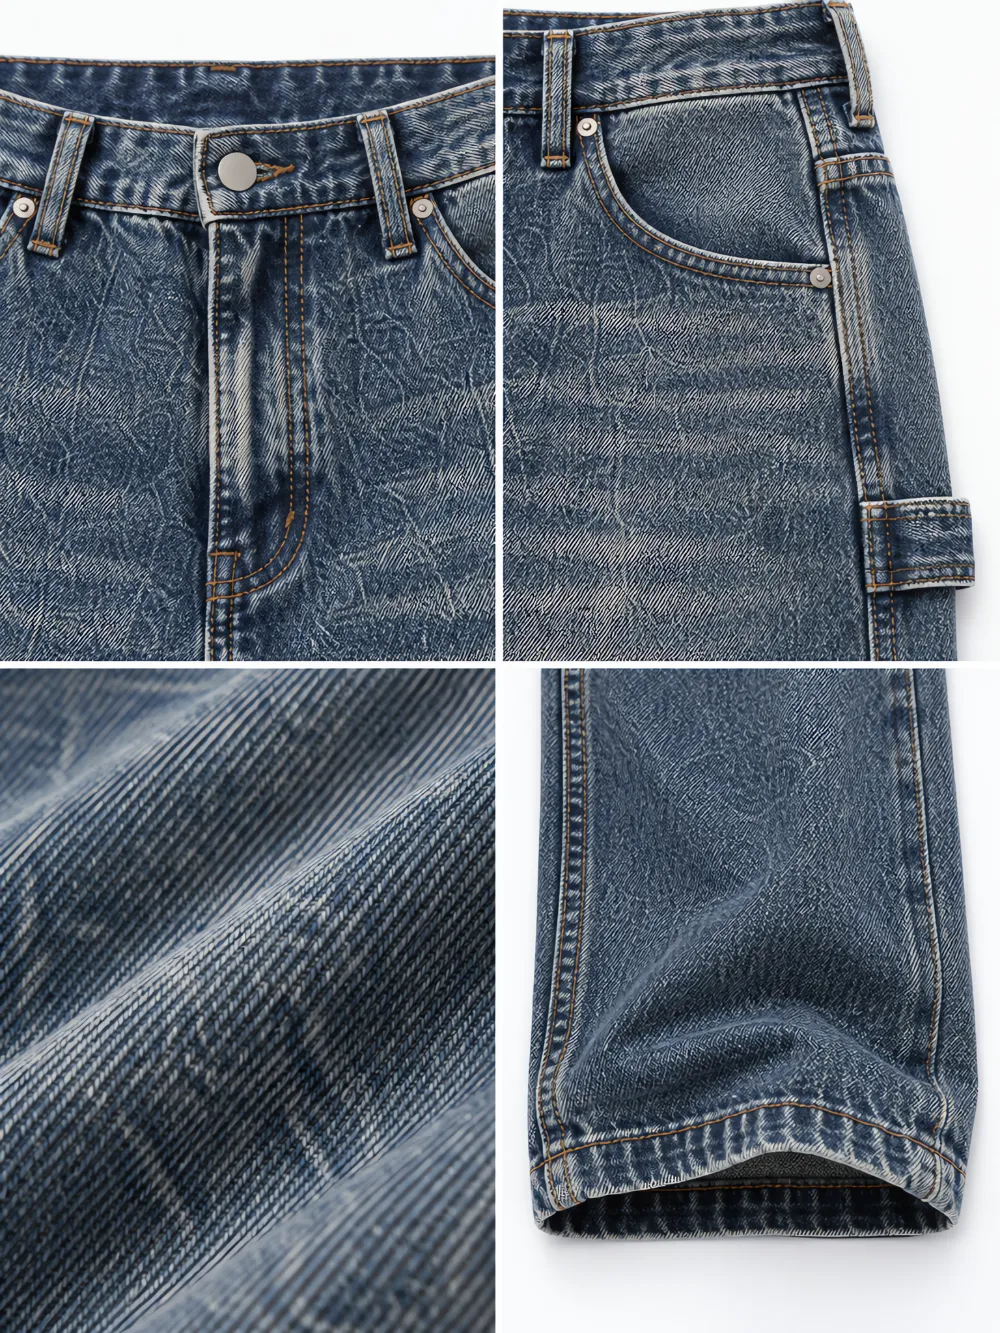
Use an illustrative row format
Illustrative example only — not a NOVITA customer production document.
The denim entries below draw on A&E guidance. They demonstrate how to organise fields; unresolved construction and setup details still need project confirmation.
| Garment location | Seam type | Stitch type | Density or stitch count | Thread example | Verification focus |
|---|---|---|---|---|---|
| Inseam | Confirm actual construction | 516 safety stitch | 7–8 SPI | Corespun polyester T-60 | Density, edge coverage and specified seam-end securing |
| Side seam | Confirm actual construction | 401 chainstitch | 7–8 SPI | Corespun polyester T-60 | Density and balance; check seam-end securing separately |
| Waistband attachment | Confirm actual construction | 401 chainstitch | 7–8 SPI | Corespun polyester T-80 | Density and specified seam-end securing |
| Fly topstitching | Confirm actual construction | 301 lockstitch, double needle | 7–8 SPI | Corespun polyester T-105 | Density and topstitch appearance |
| Belt-loop reinforcement | Confirm actual construction | 304 bartack | 28 stitches/cycle | Confirm for actual equipment | Specified points, bartack dimensions and count |
| Pocket-opening reinforcement | Confirm actual construction | 304 bartack | 28 stitches/cycle | Confirm for actual equipment | Specified points, bartack dimensions and count |
| Buttonhole | Confirm actual construction | Confirm project stitch type | 85–90 stitches per 1/2-inch buttonhole | Corespun polyester T-60 | Appearance and length |
The cycle counts describe supplier examples, not universal requirements. Add project-confirmed needle compatibility, applicable spacing or bite dimensions, reinforcement details and seam-end securing before using the rows for approval. A blank or “confirm” entry remains an open item.
Verify production and finished garments
At first-piece and initial-production checks, repeat the relevant sample checks against the approved specification. Sample-room and production-line conditions can differ. Compare actual measurements and appearance before treating the sample approval as evidence for bulk production.
Where washing, pressing or other finishing applies, repeat the relevant checks afterwards. Record finished density and puckering, and inspect for cut or broken stitches that become apparent after washing.
Close corrections and control changes
For each failed item, record the correction required, the repeat checking method, the result and the current approval status. Conditional approval needs explicit conditions and a defined follow-up. Keep the specification version, sample identifier, approval date and approver with the measured seam results.
Reverify affected seams when changes to thread, needle size or point, tension, equipment, operation sequence or SPI may alter the approved construction. Update the specification where its requirements change. Routine cleaning, lubrication or replacement with the same needle size and point need not trigger buyer approval on every occasion; the factory should retain its maintenance records.
The approval record should let both parties identify what was specified, what was measured, what was corrected and which version production is following.
Discuss Your Garment Specifications
Send NOVITA your tech pack, fabric details and sample comments. Identify the seams, stitch requirements and approval points you want to discuss for your project.